How to Make an Old Gun Shine Again
I like a challenge and to try things I haven't done earlier and this project is a real challenge. Many years ago this old shotgun was wrapped in burlap and cached in the ground and remained there for vii years. As you would expect, when the gun was unearthed the forest was gone and the metal is very corroded. This item gun then remained in a state of disrepair for many years afterwards. I was contacted by the owners asking if I could restore this weapon since he was a fan of my prior restorations.
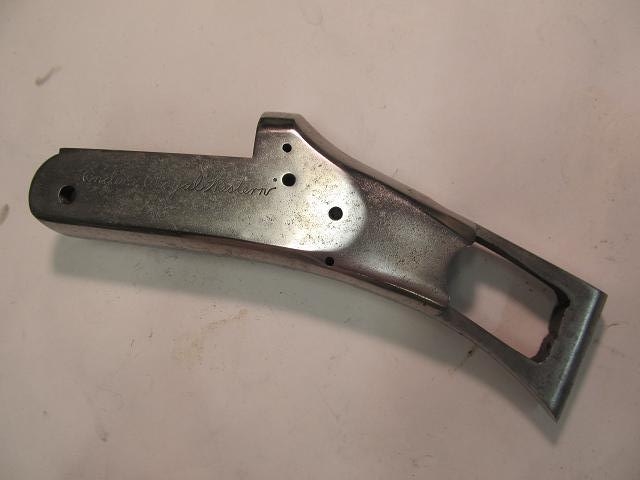
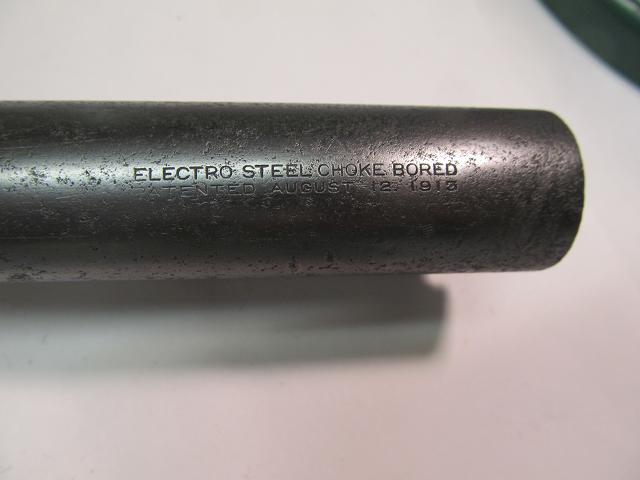
The shotgun is a Enders Majestic Western xvi Ga. Suspension activeness. The top of the butt is stamped with the following.
"Electro Steel Choke Bored gun patented Baronial 12 1913"
Web searches land that the shotgun was fabricated by Crescent Arms Co., which was associated with H & D Folsom Co. until the demise of both in the early 1930'south.
The Enders Royal single shot scattergun was manufactured in an era when it was considered an inexpensive farm tool.
Enders Purple was a "Trade" name used by the Crescent-Davis Firearms Company on shotguns fabricated for the Shapleigh Hardware Company of St. Louis, Missouri. Crescent merged with Davis in 1920, and was bought out by the Savage Firearms Visitor in 1930. This gun was fabricated somewhere in the 1918 - 1929 timeframe.
I was asked if I could restore the old gun into service. This is not to be a testify slice since the original gun was a hardware shop "farmers" tool. The goal here is to render the shotgun to usable service to be fired and then peradventure hang on a wall in restored condition. Information technology has sentimental value more than anything. Its not meant to be a trap gun or a shotgun that will see a lot of use
I accept restored a many firearms in the past simply the guns always had a stock or I could at least purchase a replacement stock. That is not the instance with this erstwhile shotgun. Weeks of searching for a replacement stock online got me nowhere. Emails to custom stock makers were besides dead ends. I take never fabricated a stock before merely that's almost to alter. I have only pocket-size tools and don't plan to purchase tools for this project.
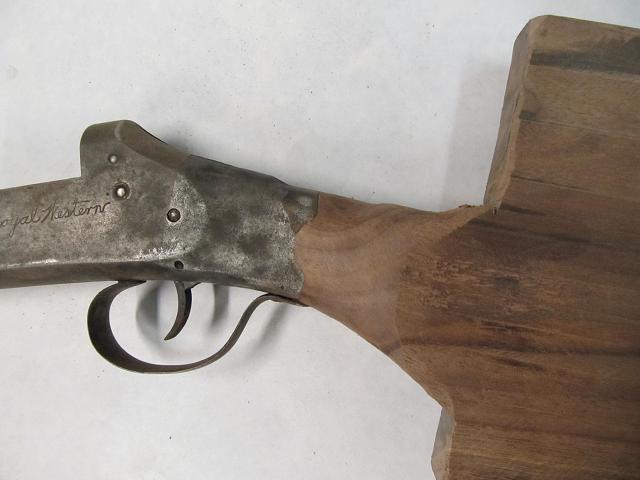
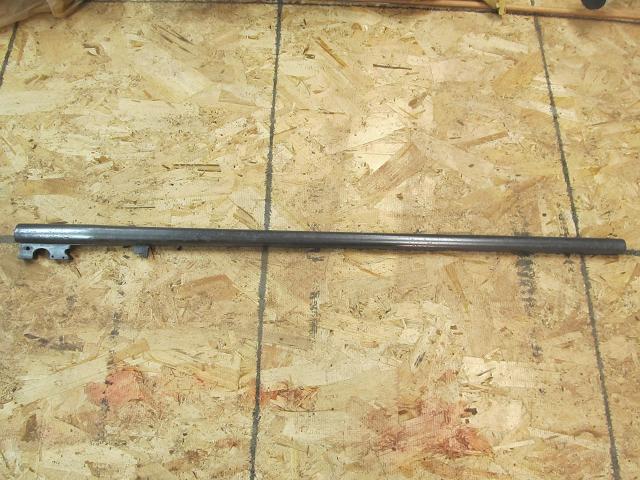
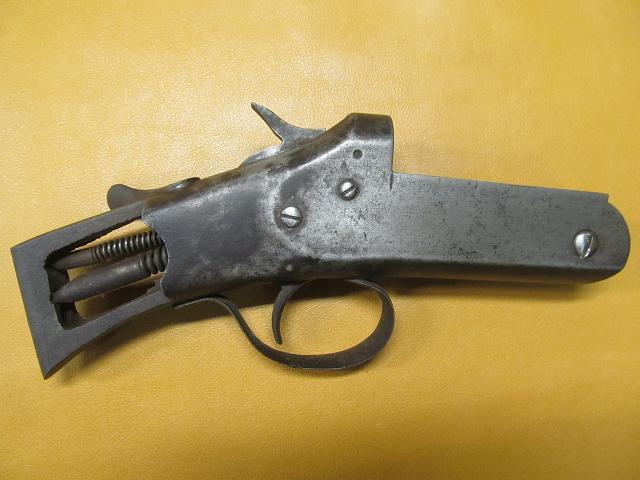
Here is the shotgun every bit I received it.
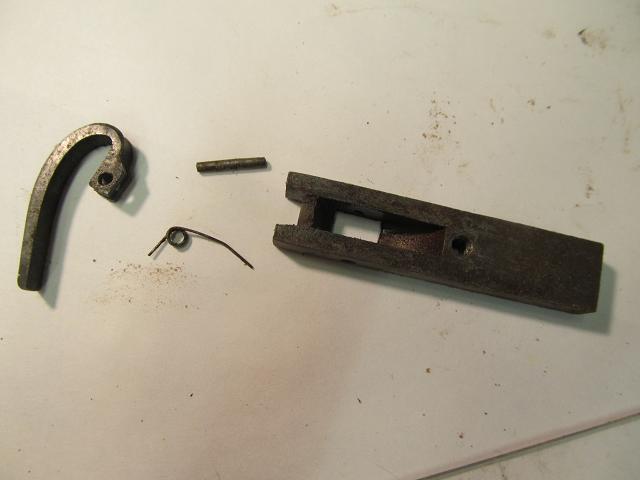
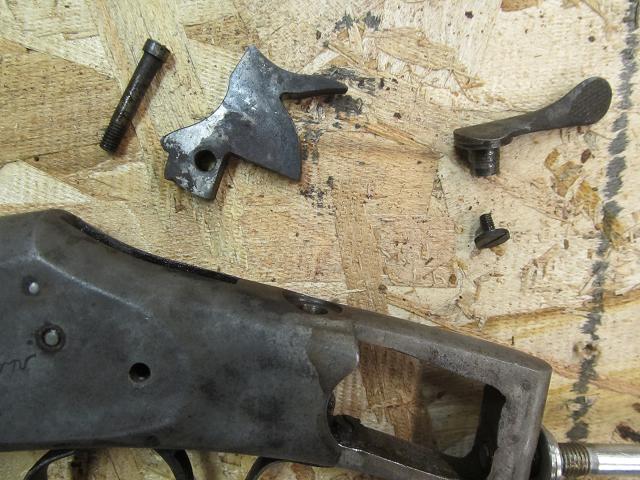
Below is the leap mechanism that will become into the forearm stock. The forearm grip of a pause activeness shotgun is removable as the first stride in taking the gun apart. One time the fore-grip is removed, the barrel can exist removed from the receiver.
My search for a replacement stock got me nowhere but I was able to detect a motion picture of the sometime gun from an online auction site that sold the gun years ago. This is all I take to go by in regards to making a stock. It'due south not much just it's a start.
It appears that the barrel was blued but the receiver and trigger guard were plated in a metal finish. While I tin cold blue I will need to come up upwards with an alternative for the receiver (or merely blue it along with all the other metal parts).

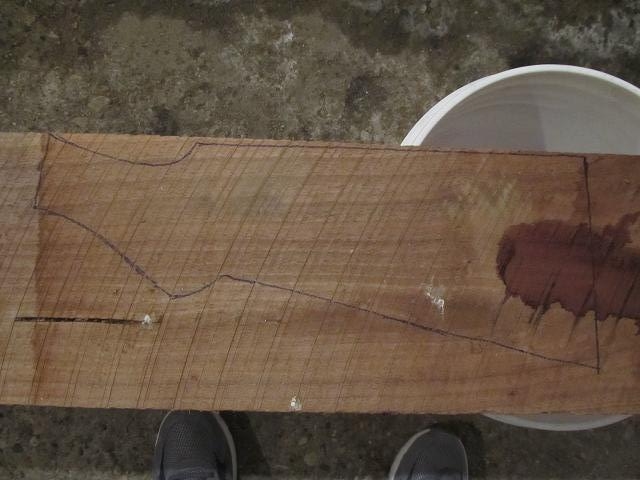
I used that screen image to create a full calibration sketch of the stock I hoped to make but over again I take never made a gun stock. If I tin can't make a stock there is no bespeak in restoring all the metal so stock making is where I accept to starting time.

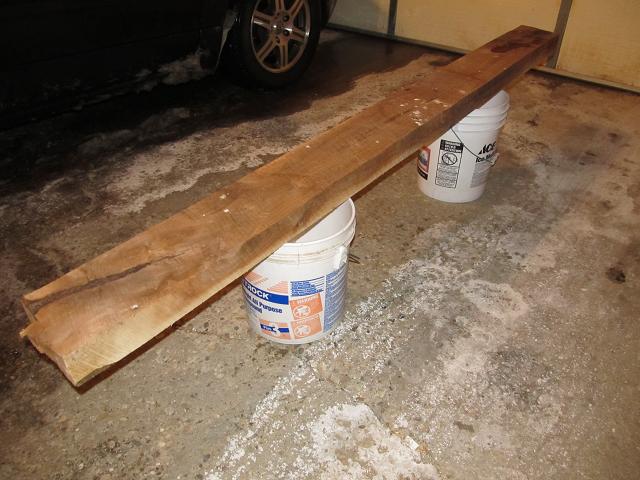
A few years ago my brother cut down a blackness walnut tree and had it sawn into dimensional lumber. It'south been sitting in his shed for a few years. He gave me a piece that measures 4" x viii" 10 7 feet. Somewhere in that twisted, cracked, checked, knotted and bird crap covered piece of woods, there are 2 pieces of a gun stock. That walnut axle is solid and heavy and it looks like there are blonde streaks running through it. I grabbed the hand saw and loped off a chunk for the fore grip stock.
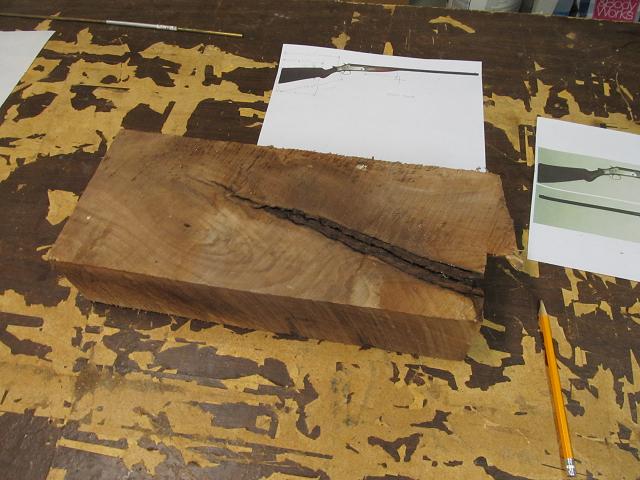
The foregrip is pretty small. I institute a expert looking piece after cut information technology on my table saw.

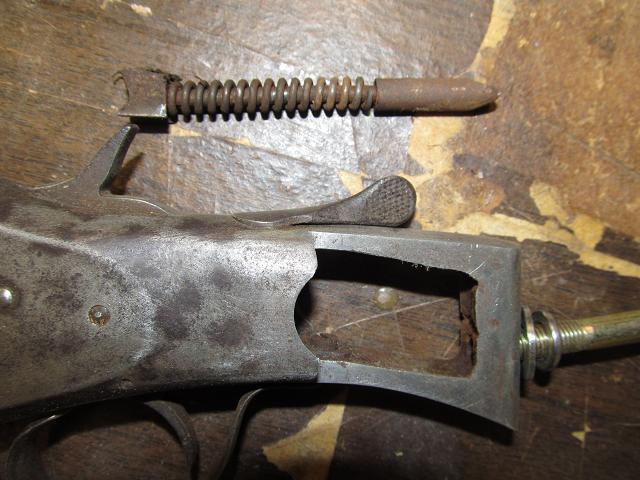
I accept to pocket out for the spring latch that holds the stock to the gun.

I plan on doing as much of this project former schoolhouse equally I tin can. Chisels, rasps, saws, planes, shaves, carving tools, sanding blocks, etc. I don't have a milling machine or router. I have a drill press only that'due south not much adept here. So it begins. For the smaller features I used an exacto chisel.
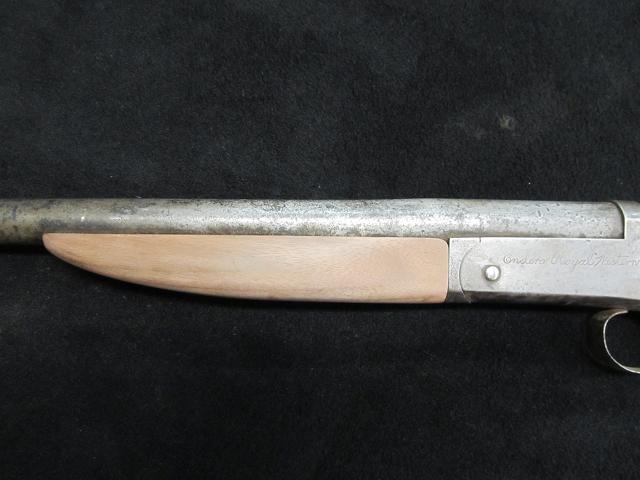
I have to make the barrel fit the length of the cake. The table saw is the best choice here.
To go rid of the ridges left by the saw blade I employed the handle from my store broom and some sandpaper. I can add together broom handle to the list of hand tools for the projection. It worked just fine. Where the barrel meets the receiver it flares out a bit. I laid the barrel on the stock and scribed lines and used carving tools.
I would coat the barrel with pencil carbon and lay it in the stock and give information technology a twist. It left marks telling me where it made contact and where I needed to take away more wood.

So some profile cuts and a hole for the spiral that mounts the leap mechanism.
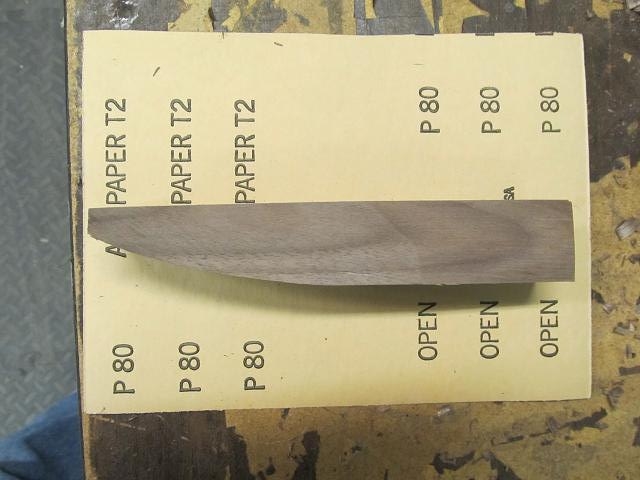
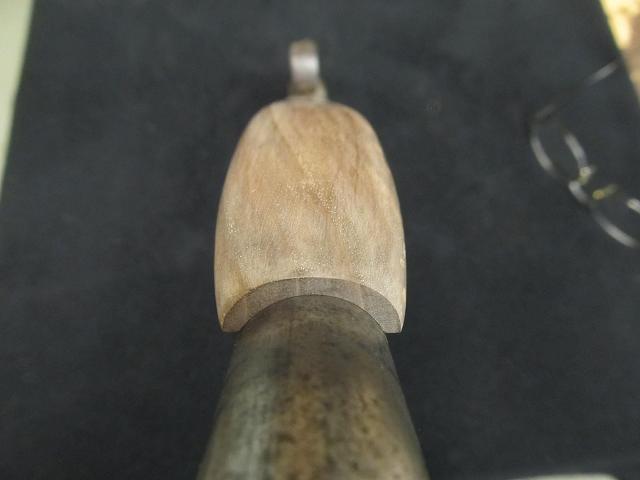
Then a whole lot of sanding and a counter-diameter so the screw head sit below the surface.
Later on the work was mostly complete (final sanding) those blonde streaks showed upwards.
I don't know if they add character or are ugly. Too before long to tell just I don't feel like starting over since any other piece might have more than blonde streaks in it as well. So far so skillful. No screw ups and no injuries.
The next step is to make sure the bound mechanism fits and the spring can movement freely. The leap mechanism is held by a single screw. That screw was missing so I need to replace information technology. No dubiousness the original spiral was blackness in color (blued) My local hardware shop does non carry machine screws in whatsoever color other than shiny zinc plated. No worries. I polished off all the plating by spinning the screw in a drill and using 800 grit sandpaper then blued the spiral head with the last remains of my bottle of Brownells Dicropan cold bluing and then gave it a lite oil coating. I accept had good results with Dicropan in the past so I demand to replenish my supply for the balance of the parts of this shotgun.

Here are the before and after pictures of the screw. After polishing


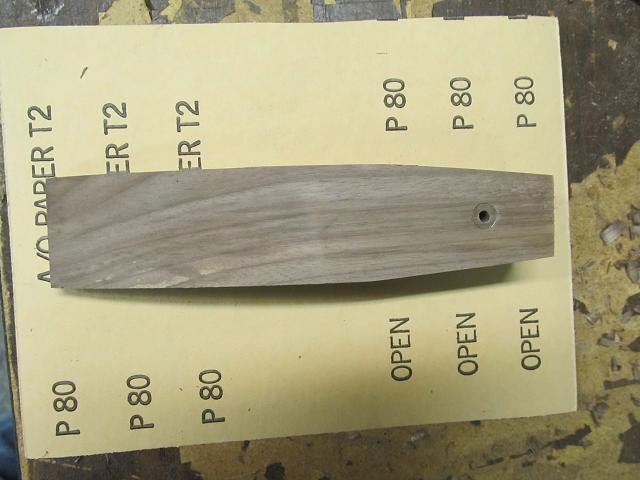
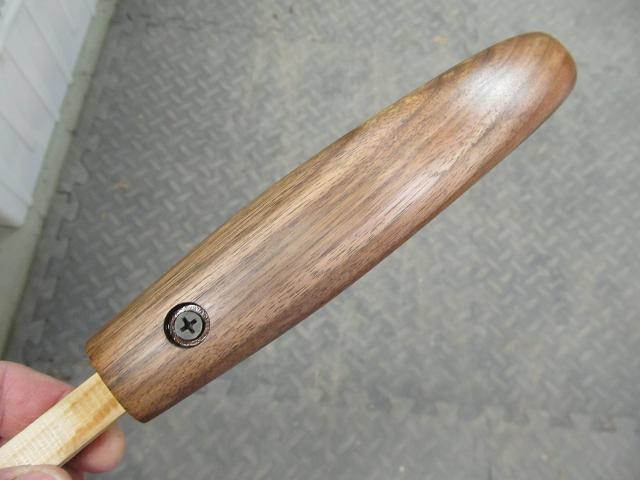
To dress up the appearance of the screw (since it has to exist seen for removal) and to protect the forest from being crushed by the spinning of the screw head into the forest I drilled the pigsty slightly larger than the head and will apply a loving cup and fiber washer from the hardware store to spread out the load on the forest. I similar the look and the fit seems good.

The spring machinery fits well in the chiseled out area.

Now for the real test, does information technology fit and does it work??
The broom handle gets an A+ for fit.
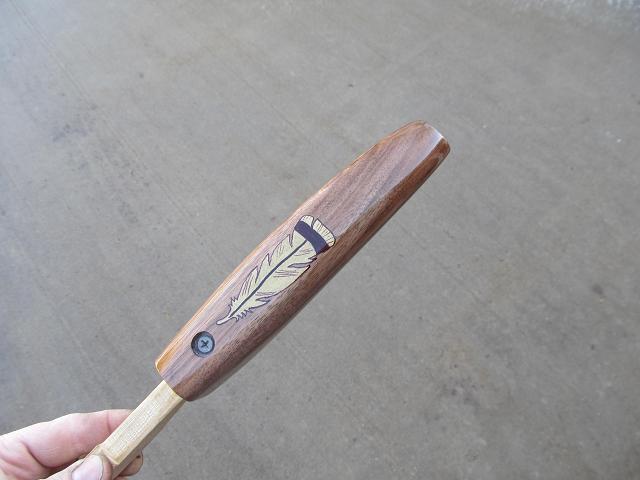
Im not certain what finish the original stock had dorsum in the 1920'southward but I tin can exist sure it didn't come out of a rattle can. Information technology may have been some sort of shellac or varnish merely more likely was been boiled linseed oil as that was a typical gun stock terminate (and still is for high finish guns) Information technology may take too been tung oil which is even so used as a gun stock finish. Both Boiled lindseed and Tung oil are available at the local hardware store and both are drying oils (unlike mineral oil that would be used on cut boards). The major difference in tung and boiled linseed oils is the dry out fourth dimension. Linseed oil means vi to 10 days between coats since its very tiresome drying. If I want to use vi to 8 coats, that would means months worth of waiting. Tung oil tin exist reapplied later 24 hours pregnant the eight coats volition price me just over a week so I will go with the tung oil. I added a makeshift handle to concur onto while doing the final sanding with 800 grit and for applying the tung oil.

A manus rubbed finish ways simply that. The brush I will use to apply the tung oil is one of a set of ten that I got from my parents on my first birthday and despite projects like this (and growing upwardly on a farm) I notwithstanding take all ten of those brushes afterward l years. Hither is the foregrip after the kickoff of many coats. Not very impressive but that first coat was sucked in nice and deep by the thirsty wood and will lay down the base of operations for the side by side vii coats. Each glaze will add together a level of protection and gloss/shean.
One stock piece (sort of) complete. Fourth dimension to starting time the butt stock. In the meantime I placed an order for some needed supplies for this projection. These supplies are about 10 times the cost of the original shotgun when new.
I don't have the tools (alpine drill press) to pull off drilling a 16 inch deep hole through the entire butt stock for the mounting bolt that attaches the stock to the receiver so I need an alternate fashion to make a barrel stock with a way to access the bolt for assembly.
The long bolt that holds the gun to the stock was not with the gun then I need a replacement. My hardware store did not carry a 5/xvi fine thread auto screw as long as I need note with a straight slotted head for a screwdriver and then I bought a commodities and slotted information technology myself.

Information technology dawned on me while looking at some of the knives I've fabricated and the bows I have made that at that place might be a way to brand the stock that fits with the uncomplicated tools I have and things I have built in the by. Then I got to thinking about the trend in gun stocks being laminated from many layers of wood and epoxy (some seem to have more than epoxy than forest). I will brand a laminated stock with but two laminations. I will split up the stock in half to pocket out for the long commodities so epoxy it back together.
Today'southward epoxies are very stiff and I have had great luck with them for knife handles and laminated bows I accept built so I have no concerns that information technology will bond this walnut with strength matching a solid piece of wood.
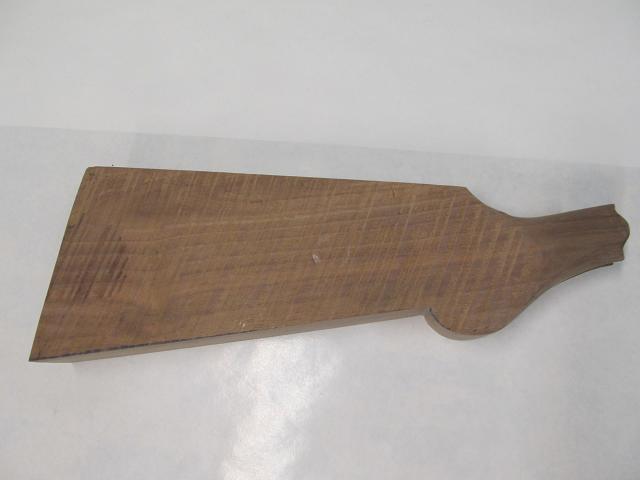
Back to the Walnut beam. This looks like a adept section. Yes that is dried blood on the beam. I hauled the beam home with my gun season cadet in the back of my truck and blood got on the beam.
Here is a view of the finish grain. Possibly there wont be any blond streaks in this slice. I am at the complete opposite end from where I got the forearm grip.

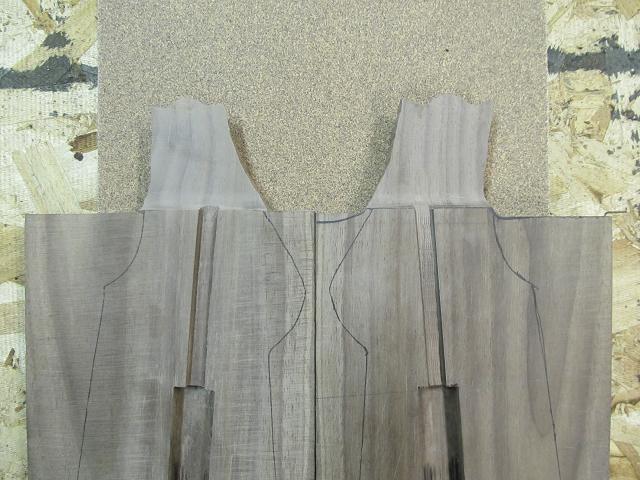
I cleaned upwardly the beam and and so sent it through my table saw creating a volume end, matched set of slabs with one slab existence slightly thicker than the other which will brand sense later on. I dont have a planer but I was able to sand the 2 surfaces downward to get rid of the saw marks so that the glue line will be very sparse and clean.

I used the tabular array saw to cut a slot for the screw and another for the washer under the head of the commodities. I had to echo information technology for both halves. Then I used a chisel to square up where the bend of the bract did non cut away the wood.

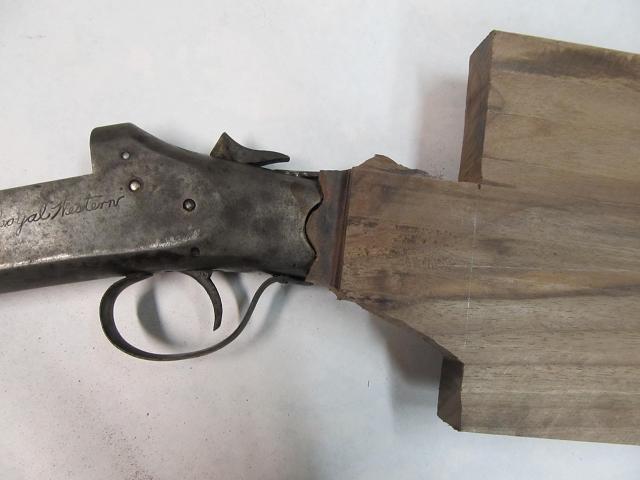
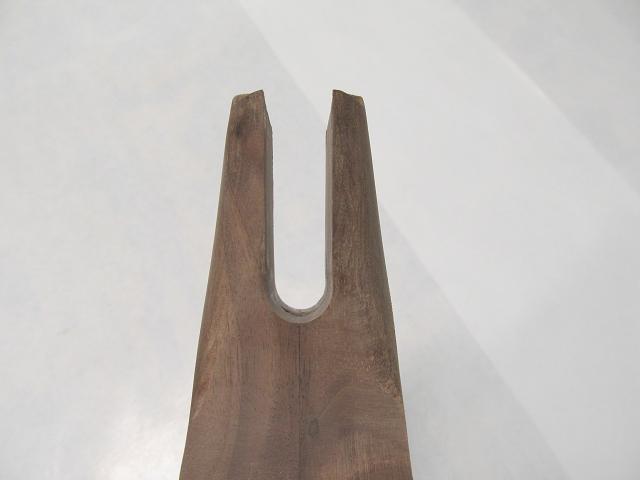
And then I needed to remove the woods where the shoulder of the receiver will fit. That office is about a ½ thick. This volition leave a square shoulder but the back of the receiver is a total circular.
This is where is gets rough. In that location are timing issues. The new radius at the back must match on each side. That'south easy enough but at the verbal time the woods and metallic meet at the back, the wood and metal at the terminate of the stock must as well match or there will be a gap at i end or the other. This has to be addressed on each half. I can rough out the profile with a coping saw but so the detail work volition come from chisels, knives and sandpaper.
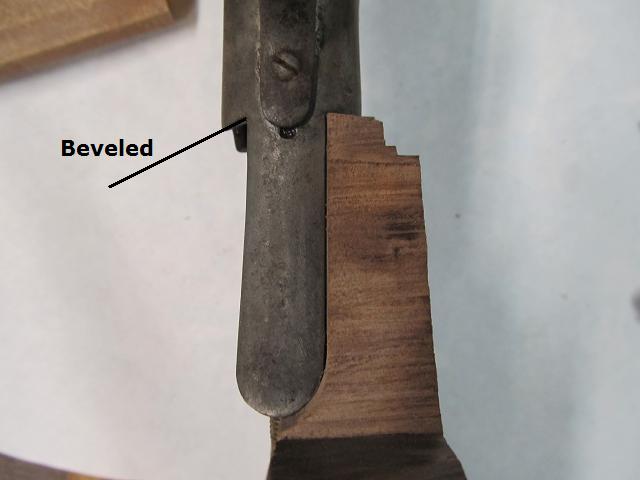
To brand things more than difficult, the coutour at the receiver end is not a square cutting. Its beveled backwards. Who came up with this design????? Its similar they said, "lets make this as difficult equally possible so that in 100 years the guy making a replacement stock will have to pull out his hair to duplicate this work".
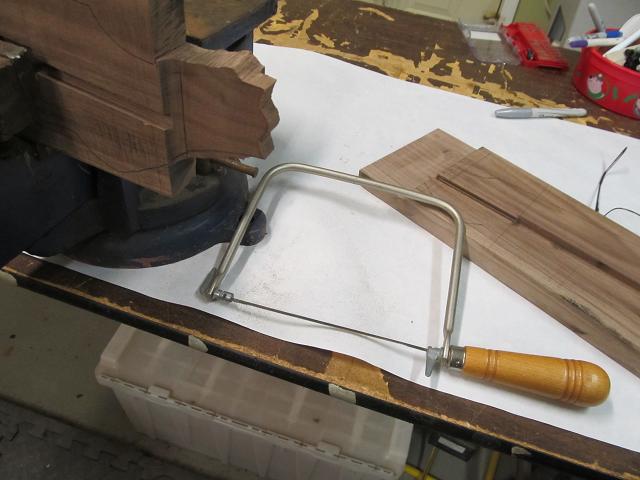
The hand saw gets me close and then carving tools and sandpaper take information technology the remainder of the way.
Both halves of the receiver articulation are consummate and so the halves are rough cutting to the shape I demand.
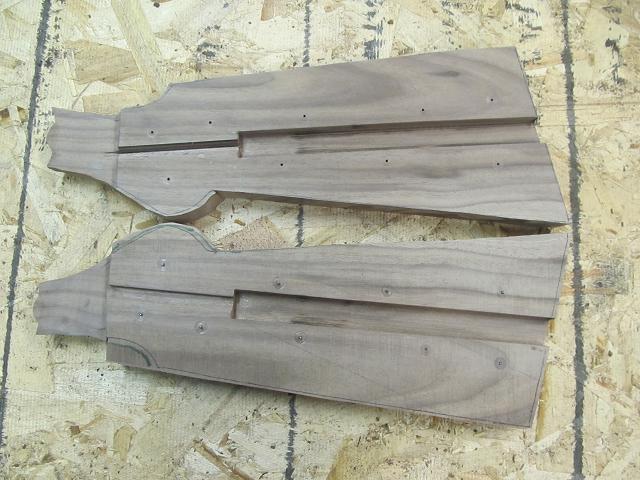
For added strength and for alignment I will use ix hardened steel pins hidden within the stock. This volition add together to the epoxies shear and tensile forcefulness but information technology also ensures the flat for the washer on both halves lines upward during the glace clamping process

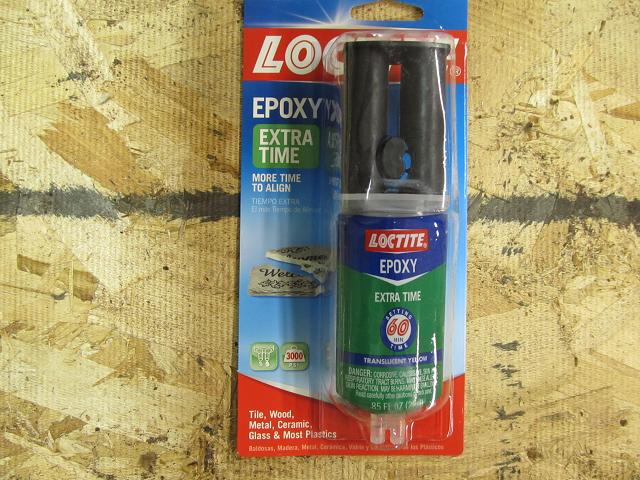
This dull cure epoxy has a three,000 PSI tensile rating, can be drilled and tapped, is waterproof and heat resistant and does not shrink. Information technology also has a good wetting property (since its slow cure). Their information sheet shows a i,345 PSI shear forcefulness on maple to maple. Equally I have stated I have used this many times in the past on forest laminations with incredible success.
Epoxy likes rough surfaces and then before I applied the epoxy I roughed upwards both halves with a hacksaw blade by bending a bract into a "u" shape and raking the teeth beyond the wood. Its of import to coat both surfaces for the all-time adhesion. Information technology uses more glue (which oozes out during clamping) but you can be sure you wont accept whatsoever dry out spots starved of epoxy.

Calorie-free clamping pressure level is all that is needed to ensure you don't clasp out the epoxy. After 24 hours the epoxy volition exist fully cured and so information technology will exist one solid piece. I used flattened stick to brand sure to scrape out the epoxy the oozed into the channel for the bolt. While the epoxy was still curing I lowered the large washer down into the hole so it stays with the stock. Only the lock washer will be removed with the bolt during disassembly in the future.
The Chocolate-brown truck made a delivery to the house .

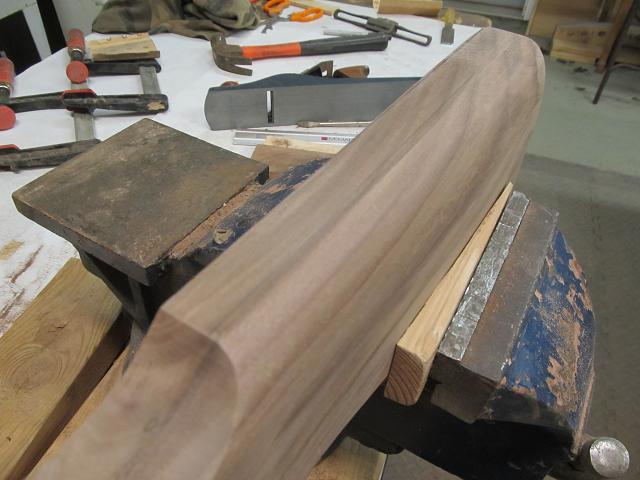
The epoxy is cured and the stock is unclamped and cleaned up to the crude outline.
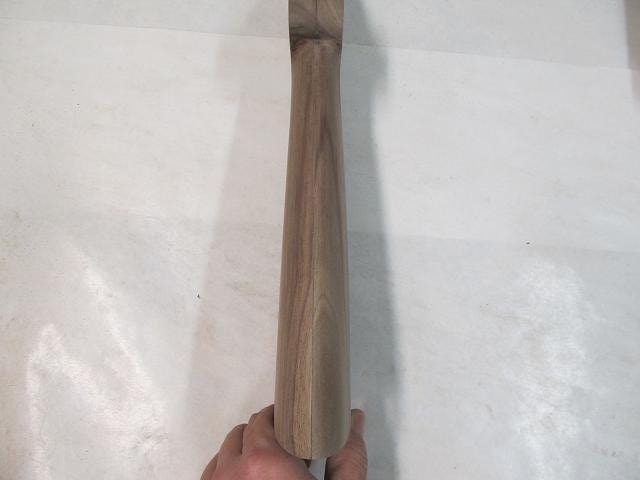
But the stock is the same thickness from back to forepart.

All the stocks on the guns I own are tapered from the butt stop to the grip so I volition do that next.

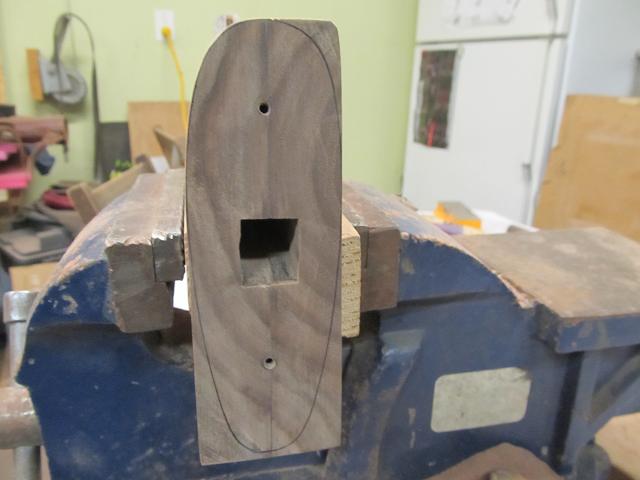
I set a depth on each side so I know when I went deep enough. And then lots of chiseling and sanding to remove all the forest.
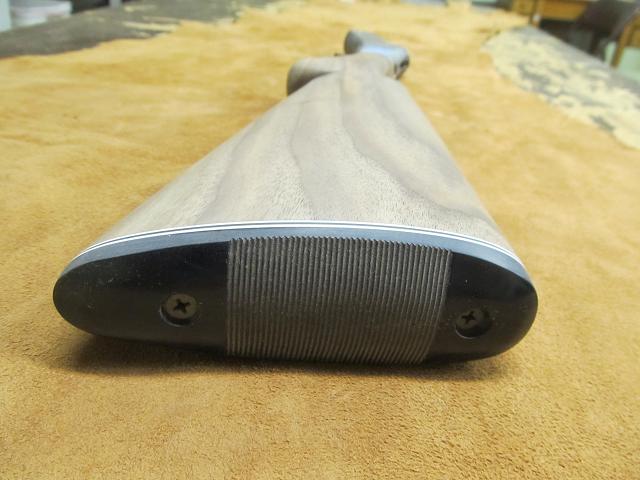
Then I used the butt plate every bit a guide for shaping. Remember I fabricated one slab of wood thicker than the other. That was so I could bias the screw holes to ane side rather than right on the glue joint. Now its fourth dimension to remove all the corners and round the stock.

This was the wrong tool for the task.

This was a better choice to go along the comb straight. It immune me to remove a lot of material very quickly.

Afterward a lot of sanding to the outline of the barrel plate, one corner is done, three more to go.
Fast frontward and all the corners are finished..

The sanding left a radius at the base of the grip.
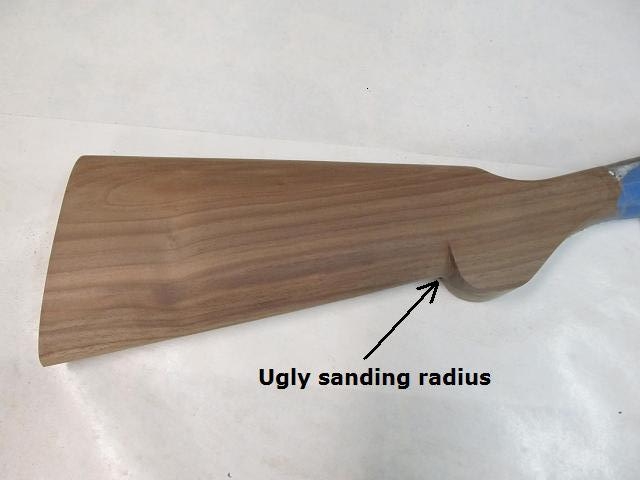
Time to break out the chisel again. And more sanding to cease with a make clean and sharp line.
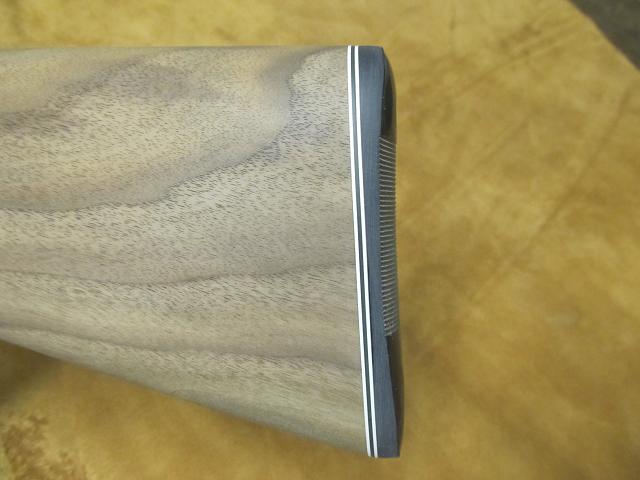
The original gun most likely had only a blackness barrel plate. While that's fine and all, I hoped to apparel information technology up a bit more and then I cutting up one of my flexible cutting boards and the divider out of a three ring binder to add together a bit more style. (nothing only the all-time for this chore. plus the guy in the cube adjacent to me will never know those dividers are missing)
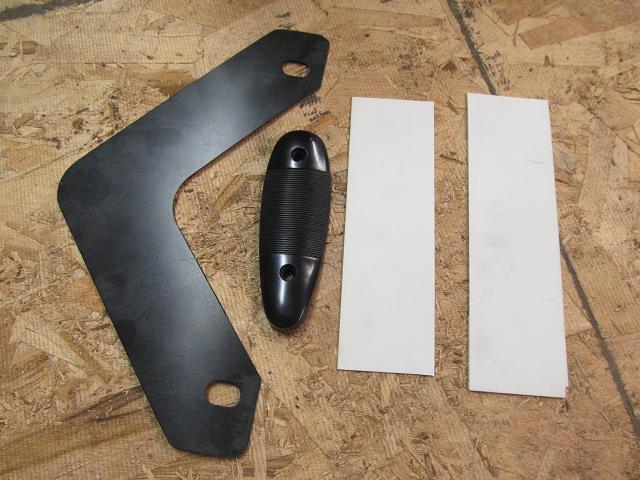
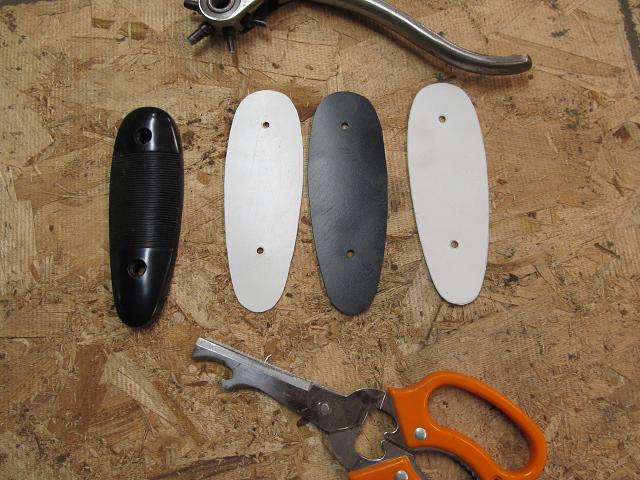
I think information technology adds a bit of grade to the look without calculation any toll.
The step that I failed to show was rounding the lesser of the grip. This stock wont have a flat grip nor a plastic grip cap so I rounded information technology off. Yous tin see that rounding in the pic above.
The next steps are to point and flute the top of the comb near the grip and to do lots of final sanding all the way to 800 grit.

I used a rat tail rasp and so a length of electrical conduit with sandpaper wrapped around information technology to remove the wood for the flute.
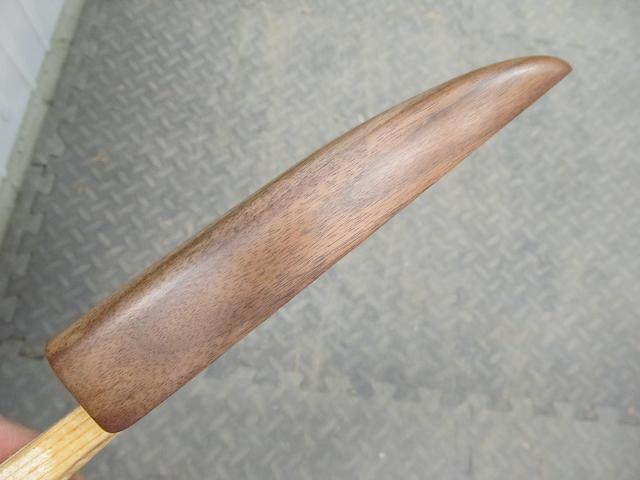
Then the entire stock was then final sanded from 180 to 600 dust and the showtime application of tung oil was applied. 7 more applications to go.
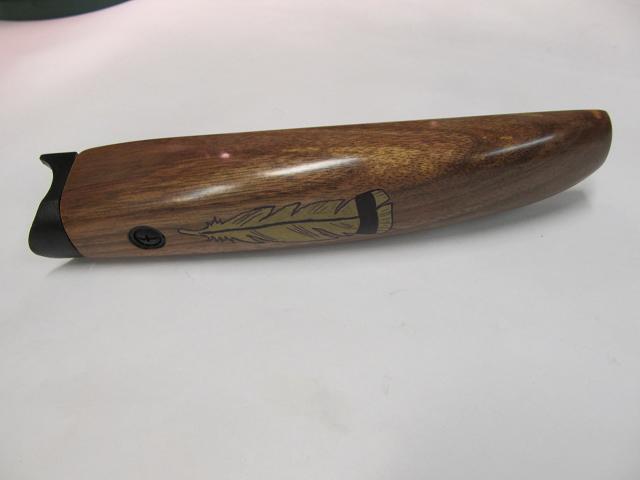
After seven coats of tung oil on the fore grip I gave it a rub downwards with 0000 steel wool and then thought I would embellish the underbelly a bit and so I got out the gilt metal and black, oil based sharpie paint pens and had a go at information technology. A few more coats of tung oil over the top of the paint will seal it in real squeamish.
I took it outside and shot a very brief video of the finish so far.
Enders fore grip stock with tung oil finish - YouTube
I am almost to the point where I can bank check "making a gun stock" off the listing of things I have always wanted to try doing.
When I tried to disassemble the metal parts of the rusty old gun I was unable to plough the 3 screws that hold major components. I was bending the tips of screwdrivers and at least one screw slot was showing damage from attempts to pause it free. I didn't want to apply heat to such an one-time weapon and sure equally hell didn't want to snap the caput off the screws with an impact commuter. What to do?.............. Google it.
Penetrating oil was the likely solution but in searching for the all-time performing product I came across a recipe I had not heard of but Im given to understand its no secret to mechanics and gun smiths.
Information technology calls for equal parts Automatic transmission fluid and Acetone. Should yous run across corroded screws or bolts and discover yourself in need of penetrating fluid I tin highly recommend this concoction. I found this blurb online.
Machinist's Workshop magazine tested penetrants for pause out torque on rusted nuts.
They arranged a test of all the popular penetrants with the control being the torque required to remove the nut from a "scientifically rusted" surroundings.
Penetrating oil ….. Average "intermission free" load
None …………………........ 516 pounds
WD-forty ………………........ 238 pounds
Lead Equalizer …………........ 214 pounds
Liquid Wrench ……...... 127 pounds
Kano Kroil …………....…. 106 pounds
ATF-Acetone mix…....….53 pounds
.
The ATF-Acetone mix was a "abode brew" mix of equal parts automated transmission fluid and acetone.
Annotation the "domicile mash" was better than whatsoever commercial product at unseizing rusted fasteners and not merely past a little. Information technology really out performed any other product on the market.. Its much less expensive than specialty oils as well. A quart of ATF is less than $iv and a quart of acetone costs about $6.
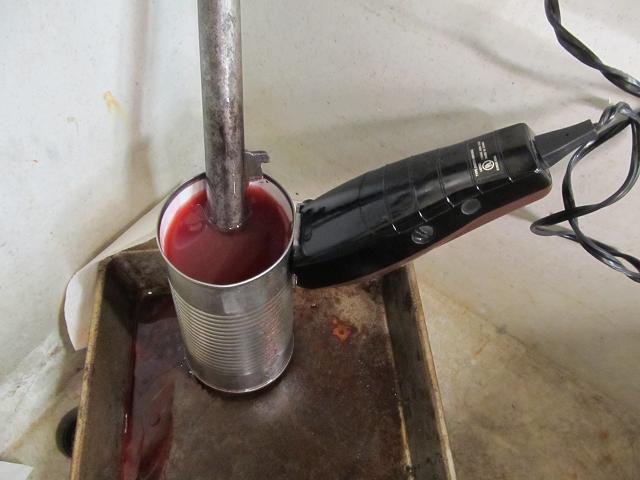
I hoped to speed the penetrating activity by submerging the entire receiver in the mixture and and then vibrating it with an ultrasonic cleaner/bathroom. The only problem is, I don't accept an ultrasonic parts cleaner.
What I do take is an old Oster hair trimmer and an empty edible bean tin.

If you are concerned about mixing the highly flammable Acetone fumes and electricity, you tin run this device on your neighbour's patio while he is at work. (condom first). Here is a short video of this technology marvel at work.
Transmission fluid and acetone and pilus clipper - YouTube
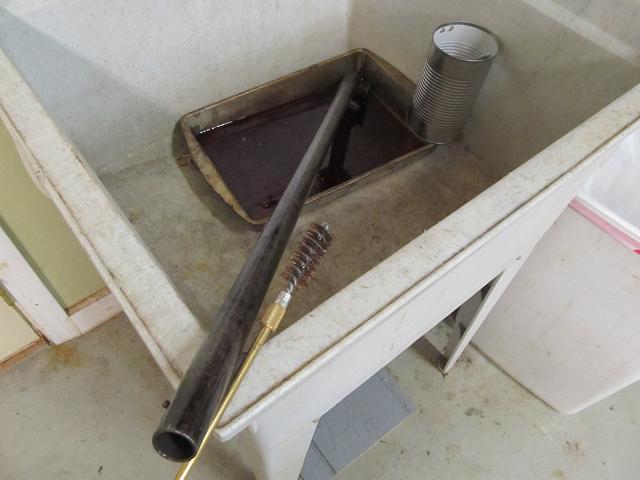
I let the receiver soak in the solution for 24 hours then wiped the entire assembly dry. The seized screws and pins were removed with normal mitt held screwdriver torque with no damage to the parts. The fluid had soaked the threads the entire depth of the parts. Im impressed by this simple mixture of fluids and will store that trick for future uses.
Now the shotgun is reduced to 40 rusty parts.

All the parts are bagged with labels telling me what they are for. I photographed every footstep of disassembly. I don't want parts (some are very close in appearance to one another) to go mixed upward. As I restore them they will be re-bagged until such fourth dimension equally I reassemble the shotgun.

Now the fun begins. I can replace nostrils full of powdered walnut with powdered iron and steel.

Im starting with the jump mechanism for the fore grip since the fore grip finish is nearly complete. This assembly is made up of 7 parts, all of which are pretty corroded. This assembly as well spent fourth dimension in the ATF and Acetone solution so I could have information technology autonomously.

Here it is right off the gun equally I received it.
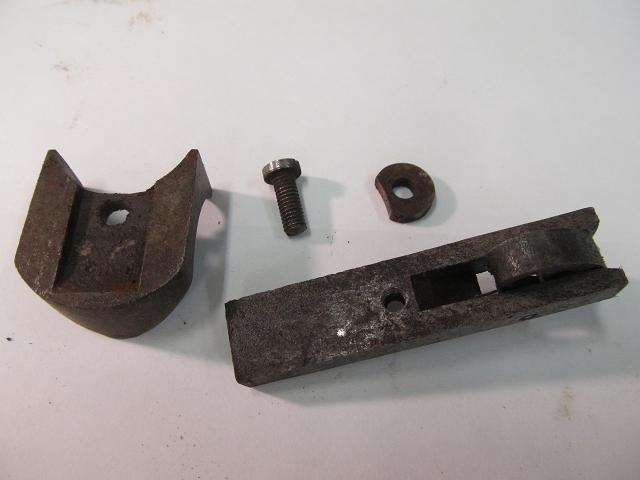
I screwed up hither and failed to accept a movie of the metal parts after cleaning and earlier bluing but here are the parts after bluing.

The S.O.P. for the parts is equally follows.
- Disassemble
- Manually descale (Dremmel, sandpaper, files, steel wool, etc) to get rid of as much surface rust as possible
- Acetone bath with tooth brush (to degrease)
- Chemical rust remover (30 minutes or longer on really corroded parts)
- Water rinse and dry
- Transmission rust removal of any spots missed
- 400 grit sanding, Steel wool and polish
- Acetone bath
- Dicropan cold bluing
- 0000 steel wool
- Acetone bath
- Dicropan common cold bluing
- 0000 steel wool
- Acetone bath
- Dicropan common cold bluing
- 0000 steel wool
- Light oil
- Bagged and tagged
The triple bluing and steel wool seems to requite information technology good colour and protection and shine.
All these parts are rusted and pitted then badly that it is not possible to remove all the pitting as it would dimensionaly alter the parts or compromise them. While the pitting remains, the chemic rust remover does a good job of removing the rust and the small-scale metal brush of the Dremmel gets into all the pits.
Many of these parts volition demand to be degreased again before I employ the baking lacquer ( protective coating) merely for now they all get thrice blued and oiled.
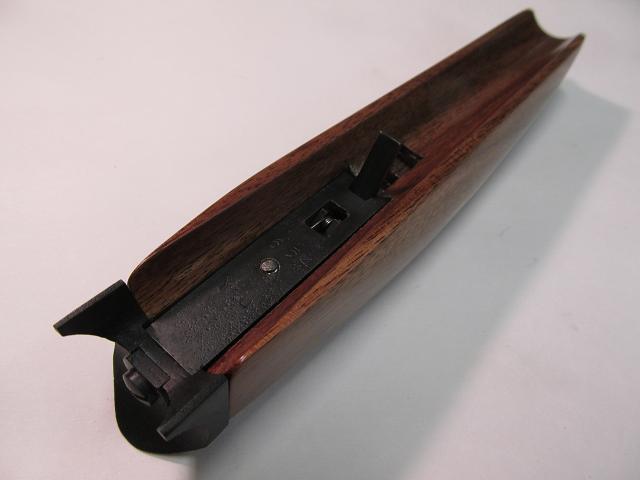
Hither is the fore grip spring mechanism reassembled after bluish and oil. Non flick perfect merely corrosion protected and functional. Information technology volition be disassembled again for the baking lacquer.

I did a amend job with the pictures on the Trigger and trigger baby-sit. Im not going to bear witness all twoscore pieces being restored equally that would only boring down the whole procedure and there are a lot more parts to deal with but yous get the idea. Its going to exist a wearisome procedure.
With all the small parts finished, I can movement onto the receiver and barrel. I put naval jelly and the receiver in a gallon sized ziploc bag for 2 hours. Im impressed with its ability to remove all corrosion. And then information technology was the same regimen used on the pocket-size parts all the mode upwards to polishing.
It cleaned up well but I did a lot of actress polishing work.
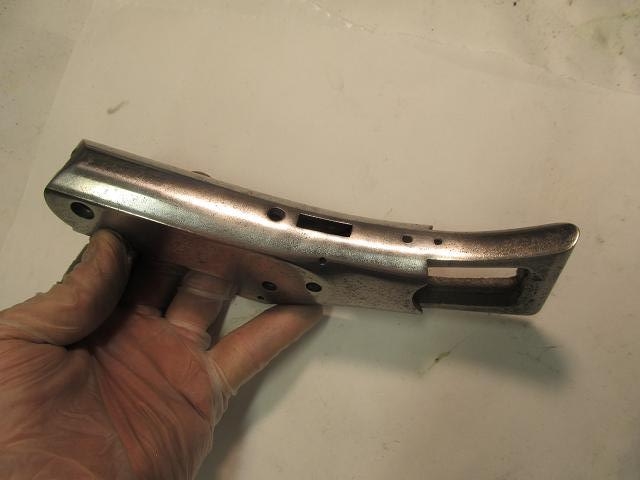

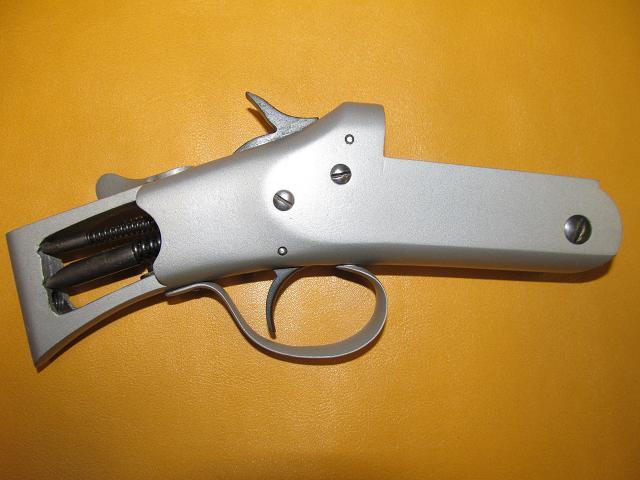
The receiver volition be coated with Brownells blistering lacquer colored stainless steel greyness to mimic the metal expect the gun had originally.
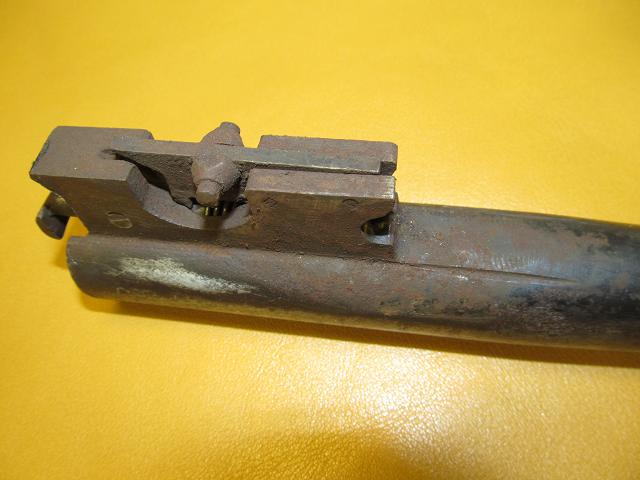
Then it was onto the barrel. Earlier in the process while I had the ATF and Acetone solution in apply, I soaked the barrel in gild to remove the attached parts. I besides used the solution in the diameter with a copper brush. What came out of the bore looked like crude oil. I worked that brush through the barrel many many times.
While working the receiver I soaked i end of the barrel in the naval jelly. My container was as well large (or I didn't have enough naval jelly) so I threw some wood strips in to enhance the level of the jelly. After 2 hours I pulled it out and rinsed information technology nether hot water and stale information technology and only gave information technology a brushing with a stiff stainless steel bristled brush and then steel wool to remove the powdery grey surface created past the naval jelly.
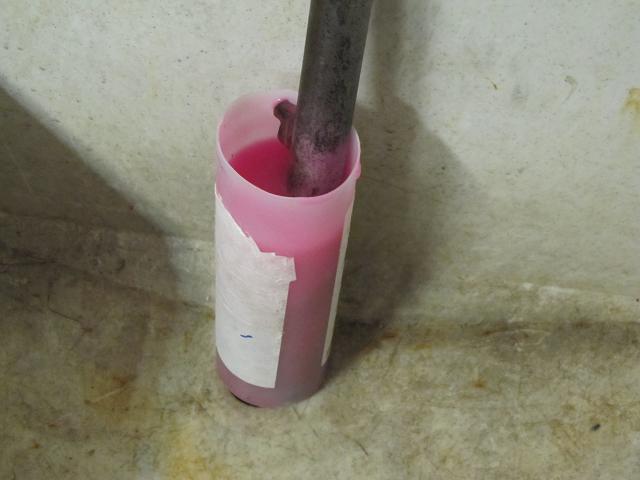
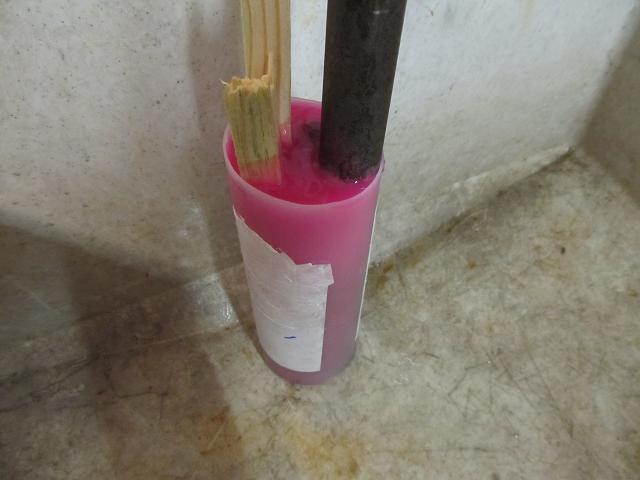

While I was out buying another Dremmel tool I picked upwards two more containers of naval jelly so I could remove the rust from the unabridged barrel. I cut in half a plastic tube that newspaper comes on for our plotter at work. This tube bathtub worked pretty well once I plugged the ends with cream and tywraps.

After 2 hours I pulled information technology out and rinsed information technology nether hot water and dried it. Here it is with the powdery grey film left by the naval jelly.

Then the wire brush and steel wool treatment.

Later on three applications of Dicropan cold blue.
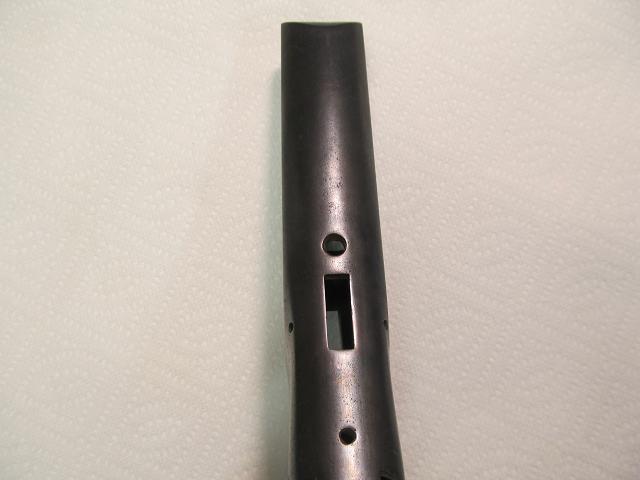
The next step is applying the Brownells baking lacquer. I did nigh of the blistering lacquer parts in the shop oven. If you haven't tried this stuff nevertheless, it great. Ive done other guns with it. It easy to use and durable. Certain parts (in keeping with the original expect of the shotgun) would be black while others would take a metallic appearance. I preheated the oven to 300 and got to spraying the parts with 3 calorie-free coats. Hither they are baking for ½ hour.

The 30 inch barrel of course would not fit in my oven so I had to improvise and build at tall skinny oven only for the barrel. I used an electric hot plate, some stove pipe, plywood, can foil, and a wire hanger.

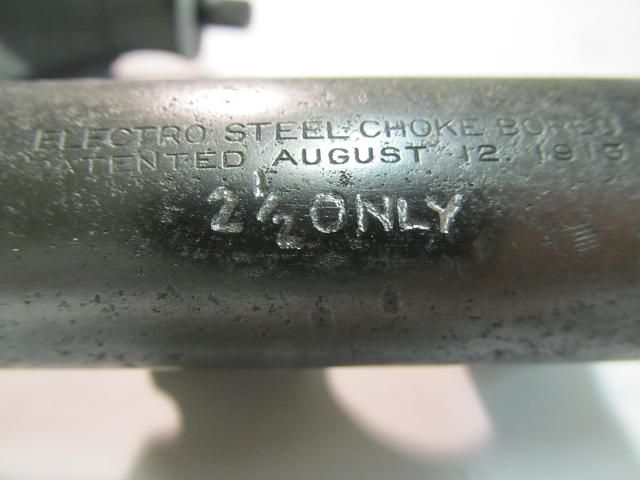
I let that engineering marvel preheat while I took a diamond tool mounted in my Dremmel to the barrel to add a marker that was missing.
The butt likewise cooked for thirty minutes.

Hither are some of the pocket-size parts after they cooled and after I ran a tap through all the holes to clean up the threads from the over spray.
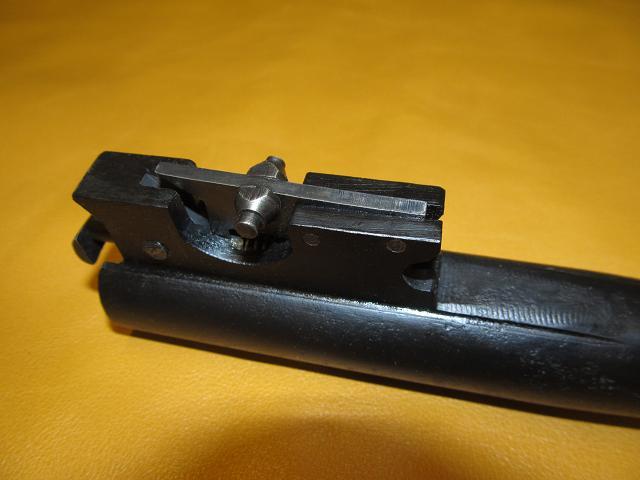
Here is the barrel after its cooled and ii applications of paste wax applied.
I am gear up to begin assembling all the parts into a gun. Im making progress on the butt stock too. After several coats during this calendar week, I took later it with 600 grit sandpaper and gave it some other of many applications of tung oil.

When I began this project I took dozens upon dozens of photos during the disassembly process to assistance me in reassembling the gun since I knew there was going to be a adept bargain of time before I would be putting the pieces back together and I wouldnt call back how to practice it. I took pictures of the parts in their assembled state to run into how they interfaced with i some other similar this.

And so as I removed the parts I took pictures of the orientation so I could reverse the procedure later on like this.
Despite my best efforts I still managed to mess up the reassembly. On more than than ane occasion I failed to pay close enough attention to my photos and tried to put information technology back together incorrectly. Perchance I was in also neat a hurry. One time I slowed downwardly and really studied the pictures and put things back not simply in the proper orientation but in the correct sequence (some parts had to exist assembled before others) then it all came together quite well. At this point all the metallic parts are reassembled. Here are a few before and later pics.
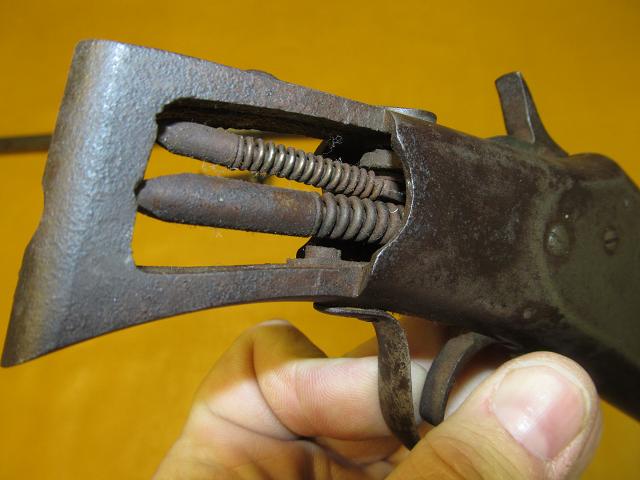
These two springs proved to exist the most hard to shrink and reassemble. I can envision the custom tool they no dubiousness used in mass production. I spent the most time coming up with a style to reinstall these springs without marring the finish on the receiver.
Before


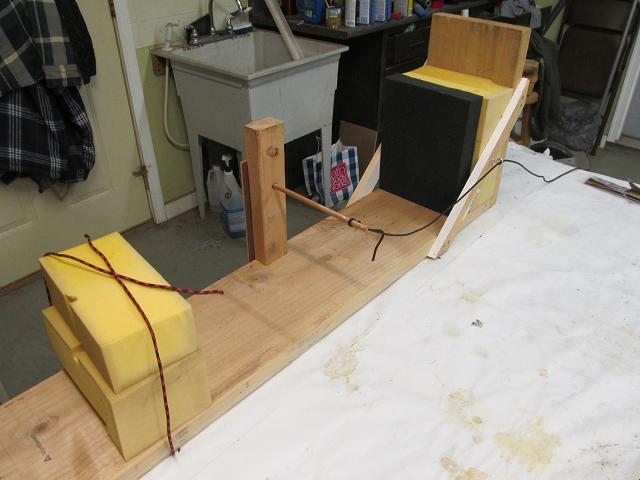
Then I turned to the fore grip forest and spring assembly. In that location are still more applications of tung oil to be worked into the butt stock so I can't assemble the complete shotgun so I will turn my attending to building a remote means of test firing this old gun. I demand to brand a sled to hold the gun securely and a manner to trigger information technology from about 60 feet away. Dorsum to making sawdust
Down to the final ii applications of tung oil on the barrel stock so I am prepping the test firing sled.
The gun will be secure in foam and I tin pull the trigger from threescore feet away while the video camera captures information technology all up close

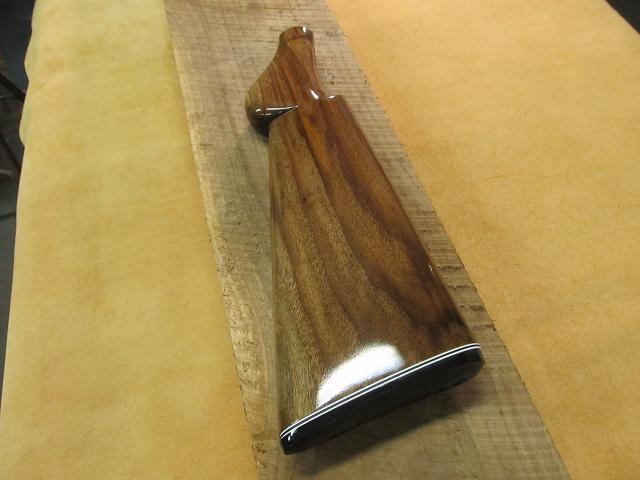
The gun rehabilitation is complete. The stock is finished. Here it is sitting on what remains of the walnut axle if came from.
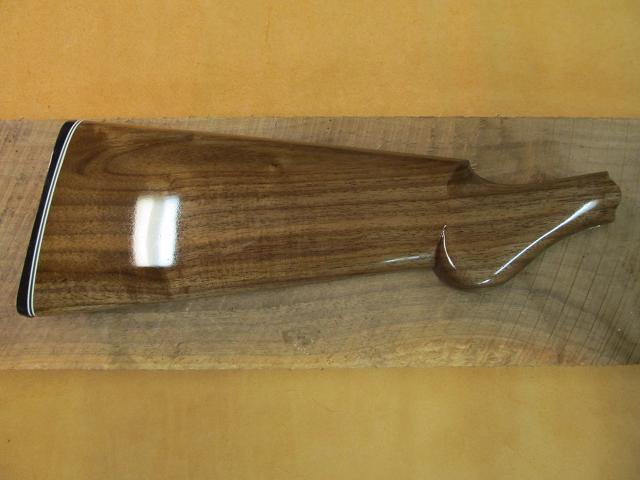
Here is a brief video that better shows the stock finish.
Enders Royal western stock finished - YouTube
The 2 ½ inch 16 ga shells arrived in the post today. All I need is the atmospheric condition to improve then I can test burn it. At any rate, here information technology is in its completed country.
Source: https://www.montanasportingjournal.com/home/2018/3/23/iir1fsqqir3q7wj9wjwevw6iqau8y1
0 Response to "How to Make an Old Gun Shine Again"
Post a Comment